Overview
You can use pre-written building blocks, called actions, in your workflow. An action is a pre-defined, reusable set of jobs or code that perform specific tasks within a workflow.
Actions can be:
- Reusable: actions can be used across different workflows and repositories, allowing you to avoid rewriting the same code.
- Pre-written: many actions are available in the GitHub Marketplace, covering a wide range of tasks like checking out code, setting up environments, running tests, and deploying applications.
- Configurable: you can configure actions with inputs, outputs, and environment variables to tailor them to your specific needs.
- Community-driven: you can create your own actions and share them with others or use actions developed by the community.
The actions you use in your workflow can be defined in:
- The same repository as your workflow file
- Any public repository
- A published Docker container image on Docker Hub
GitHub Marketplace is a central location for you to find actions created by the GitHub community. GitHub Marketplace page enables you to filter for actions by category.
Browsing Marketplace actions in the workflow editor
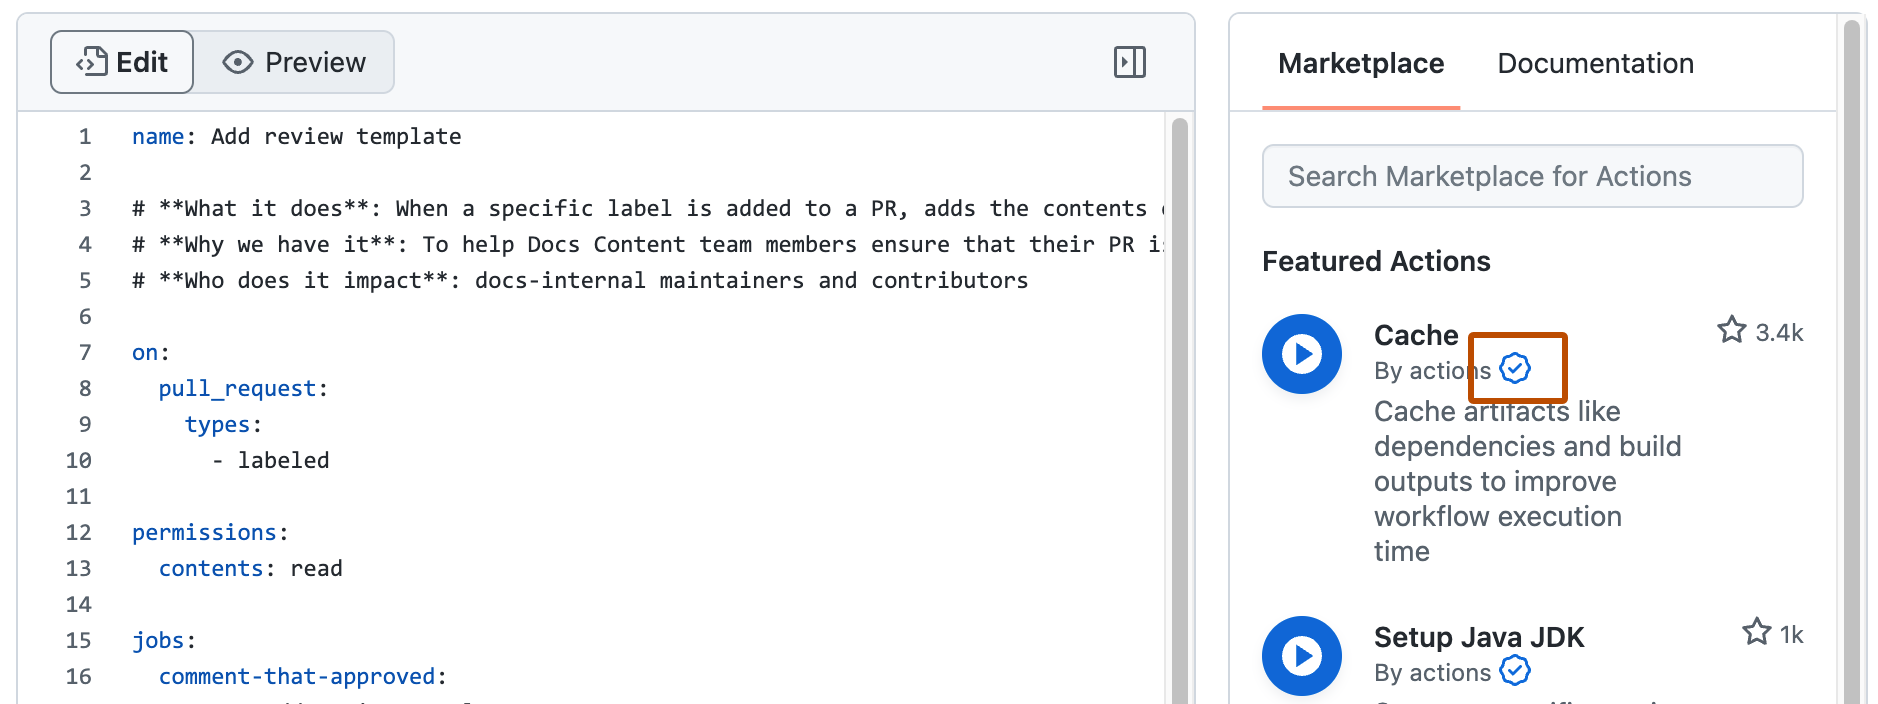
You can search and browse actions directly in your repository's workflow editor. From the sidebar, you can search for a specific action, view featured actions, and browse featured categories. You can also view the number of stars an action has received from the GitHub community.
- In your repository, browse to the workflow file you want to edit.
- In the upper right corner of the file view, to open the workflow editor, click .

- To the right of the editor, use the GitHub Marketplace sidebar to browse actions. Actions with the badge indicate GitHub has verified the creator of the action as a partner organization.


Adding an action to your workflow
You can add an action to your workflow by referencing the action in your workflow file.
You can view the actions referenced in your GitHub Actions workflows as dependencies in the dependency graph of the repository containing your workflows. For more information, see “About the dependency graph.”
참고: 보안을 위해 GitHub Actions는 작업 또는 재사용 가능한 워크플로의 리디렉션을 지원하지 않습니다. 즉, 소유자, 작업 리포지토리의 이름, 또는 작업 이름이 변경되면, 이전 이름으로 해당 작업을 사용하는 워크플로가 작동하지 않습니다.
Adding an action from GitHub Marketplace
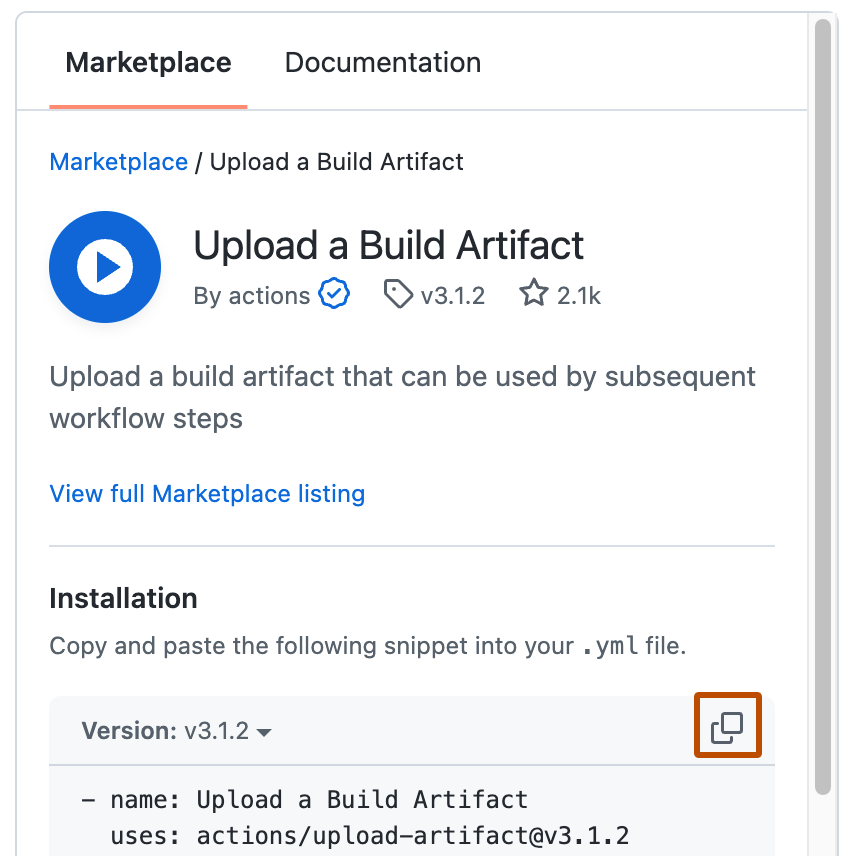
An action's listing page includes the action's version and the workflow syntax required to use the action. To keep your workflow stable even when updates are made to an action, you can reference the version of the action to use by specifying the Git or Docker tag number in your workflow file.
- Navigate to the action you want to use in your workflow.
- Click to view the full marketplace listing for the action.
- Under "Installation", click to copy the workflow syntax.
- Paste the syntax as a new step in your workflow. For more information, see "GitHub Actions에 대한 워크플로 구문."
- If the action requires you to provide inputs, set them in your workflow. For information on inputs an action might require, see "Using pre-written building blocks in your workflow."

워크플로에 추가하는 작업에 대해 Dependabot version updates를 사용하도록 설정할 수도 있습니다. 자세한 내용은 "Dependabot을 사용하여 작업을 최신 상태로 유지"을(를) 참조하세요.
Adding an action from the same repository
If an action is defined in the same repository where your workflow file uses the action, you can reference the action with either the {owner}/{repo}@{ref} or ./path/to/dir syntax in your workflow file.
리포지토리 파일 구조 예시:
|-- hello-world (repository)
|   |__ .github
|       └── workflows
|           └── my-first-workflow.yml
|       └── actions
|           |__ hello-world-action
|               └── action.yml
경로는 기본 작업 디렉터리(github.workspace, $GITHUB_WORKSPACE)에 대해 상대적(./) 경로입니다. 작업이 리포지토리를 워크플로와 다른 위치로 검사하는 경우 로컬 작업에 사용되는 상대 경로를 업데이트해야 합니다.
워크플로 파일 예시:
jobs:
  my_first_job:
    runs-on: ubuntu-latest
    steps:
      # This step checks out a copy of your repository.
      - name: My first step - check out repository
        uses: actions/checkout@v4
      # This step references the directory that contains the action.
      - name: Use local hello-world-action
        uses: ./.github/actions/hello-world-action
The action.yml file is used to provide metadata for the action. Learn about the content of this file in "GitHub Actions에 대한 메타데이터 구문."
Adding an action from a different repository
If an action is defined in a different repository than your workflow file, you can reference the action with the {owner}/{repo}@{ref} syntax in your workflow file.
The action must be stored in a public repository.
jobs:
  my_first_job:
    steps:
      - name: My first step
        uses: actions/setup-node@v4
Referencing a container on Docker Hub
If an action is defined in a published Docker container image on Docker Hub, you must reference the action with the docker://{image}:{tag} syntax in your workflow file. To protect your code and data, we strongly recommend you verify the integrity of the Docker container image from Docker Hub before using it in your workflow.
jobs:
  my_first_job:
    steps:
      - name: My first step
        uses: docker://alpine:3.8
For some examples of Docker actions, see the Docker-image.yml workflow and "Docker 컨테이너 작업 만들기."
Security hardening for using actions in your workflows
GitHub는 워크플로의 보안을 강화하는 데 사용할 수 있는 보안 기능을 제공합니다. GitHub의 기본 제공 기능으로 이용하는 작업의 약점에 대한 알림을 받거나 워크플로의 작업을 최신 상태로 유지하는 프로세스를 자동화할 수 있습니다. 자세한 내용은 "GitHub의 보안 기능을 사용하여 안전하게 GitHub Actions 사용"을(를) 참조하세요.
Using release management for your custom actions
The creators of a community action have the option to use tags, branches, or SHA values to manage releases of the action. Similar to any dependency, you should indicate the version of the action you'd like to use based on your comfort with automatically accepting updates to the action.
You will designate the version of the action in your workflow file. Check the action's documentation for information on their approach to release management, and to see which tag, branch, or SHA value to use.
Note: We recommend that you use a SHA value when using third-party actions. However, it's important to note Dependabot will only create Dependabot alerts for vulnerable GitHub Actions that use semantic versioning. For more information, see "GitHub Actions에 대한 보안 강화" and "Dependabot 경고 정보."
Using tags
Tags are useful for letting you decide when to switch between major and minor versions, but these are more ephemeral and can be moved or deleted by the maintainer. This example demonstrates how to target an action that's been tagged as v1.0.1:
steps:
  - uses: actions/javascript-action@v1.0.1
Using SHAs
If you need more reliable versioning, you should use the SHA value associated with the version of the action. SHAs are immutable and therefore more reliable than tags or branches. However, this approach means you will not automatically receive updates for an action, including important bug fixes and security updates. You must use a commit's full SHA value, and not an abbreviated value. SHA를 선택할 때는 해당 SHA가 리포지토리 포크가 아닌 작업의 리포지토리에서 온 것인지 확인해야 합니다. This example targets an action's SHA:
steps:
  - uses: actions/javascript-action@a824008085750b8e136effc585c3cd6082bd575f
Using branches
Specifying a target branch for the action means it will always run the version currently on that branch. This approach can create problems if an update to the branch includes breaking changes. This example targets a branch named @main:
steps:
  - uses: actions/javascript-action@main
For more information, see "사용자 지정 작업 정보."
Using inputs and outputs with an action
An action often accepts or requires inputs and generates outputs that you can use. For example, an action might require you to specify a path to a file, the name of a label, or other data it will use as part of the action processing.
To see the inputs and outputs of an action, check the action.yml or action.yaml in the root directory of the repository.
In this example action.yml, the inputs keyword defines a required input called file-path, and includes a default value that will be used if none is specified. The outputs keyword defines an output called results-file, which tells you where to locate the results.
name: "Example"
description: "Receives file and generates output"
inputs:
  file-path: # id of input
    description: "Path to test script"
    required: true
    default: "test-file.js"
outputs:
  results-file: # id of output
    description: "Path to results file"
Next steps
To continue learning about GitHub Actions, see "GitHub Actions 이해."