Introduction
GitHub Desktop provides support for a number of editors, and also allows you to select a custom editor if your preferred editor is not supported. If you installed an editor while GitHub Desktop was open you will need to quit and reopen GitHub Desktop in order for the editor to be detected.
Supported editors
- MacVim
- Visual Studio Code
- Visual Studio Codium
- Sublime Text
- BBEdit
- JetBrains WebStorm
- JetBrains PhpStorm
- JetBrains Rider
- JetBrains PyCharm
- JetBrains RubyMine
- JetBrains IntelliJ IDEA
- JetBrains GoLand
- JetBrains Fleet
- JetBrains DataSpell
- TextMate
- Brackets
- To use Brackets with GitHub Desktop, you must install the Command Line shortcut. To install the shortcut, open Brackets, click File in the menu bar, then click Install Command Line Shortcut.
- Typora
- CodeRunner
- SlickEdit
- Xcode
- RStudio
- Nova
- Android Studio
- Aptana Studio
- Neovide
- Emacs
- Lite XL
- Pulsar
- Zed
- Visual Studio Code
- Visual Studio Codium
- Sublime Text
- ColdFusion Builder
- Typora
- SlickEdit
- JetBrains IntelliJ Idea
- JetBrains WebStorm
- JetBrains PhpStorm
- JetBrains Rider
- JetBrains CLion
- JetBrains PyCharm
- JetBrains RubyMine
- JetBrains GoLand
- JetBrains Fleet
- JetBrains DataSpell
- Android Studio
- Brackets
- Notepad++
- RStudio
- Aptana Studio
Configuring a default editor
-
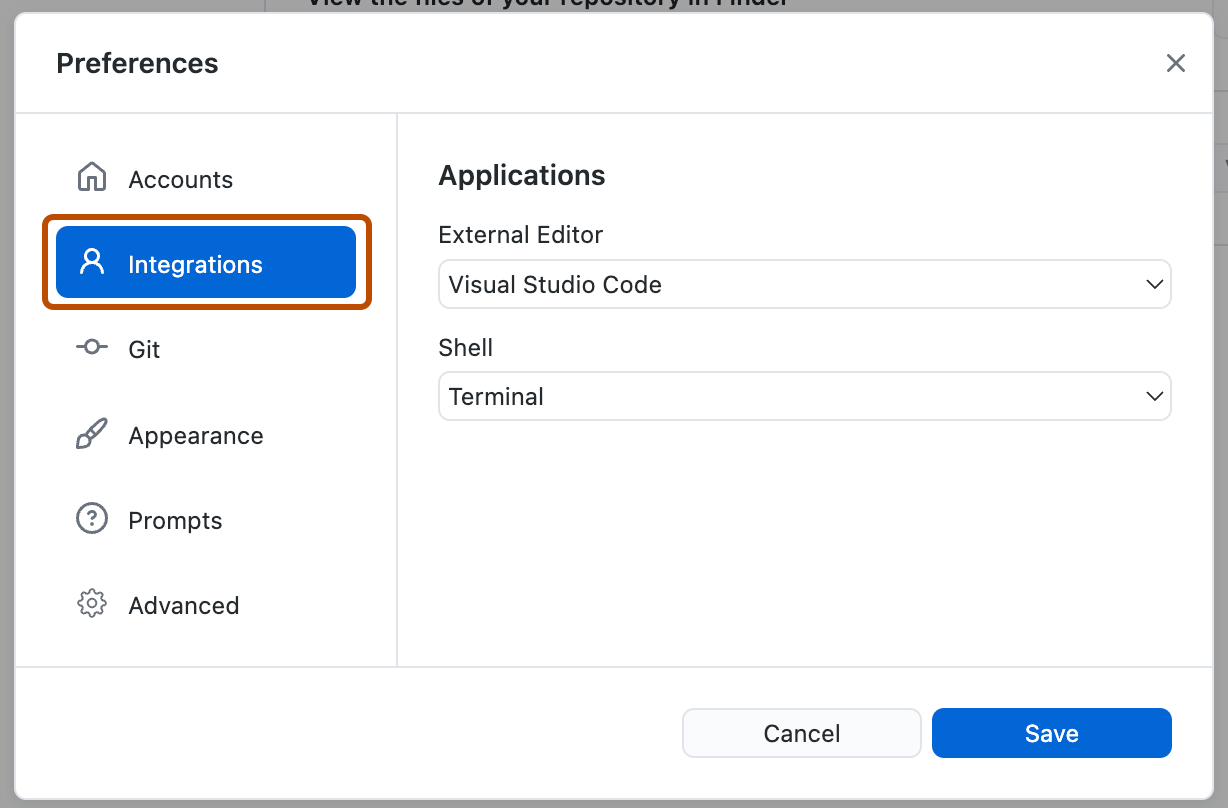
In the menu bar, select GitHub Desktop, then click Preferences.

-
In the Preferences window, select Integrations.
-
Under "External Editor", use the dropdown menu to select the editor you want to set as your default.
-
Click Save.


-
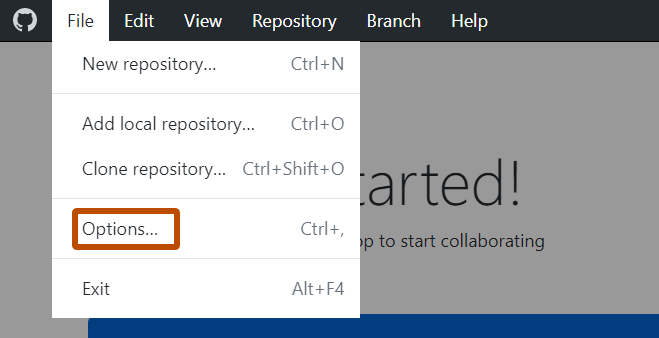
Use the File menu, then click Options.
-
In the Options window, select Integrations.
-
Under "External Editor", use the dropdown menu to select the editor you want to set as your default.
-
Click Save.


Configuring a custom editor
-
In the menu bar, select GitHub Desktop, then click Preferences.
-
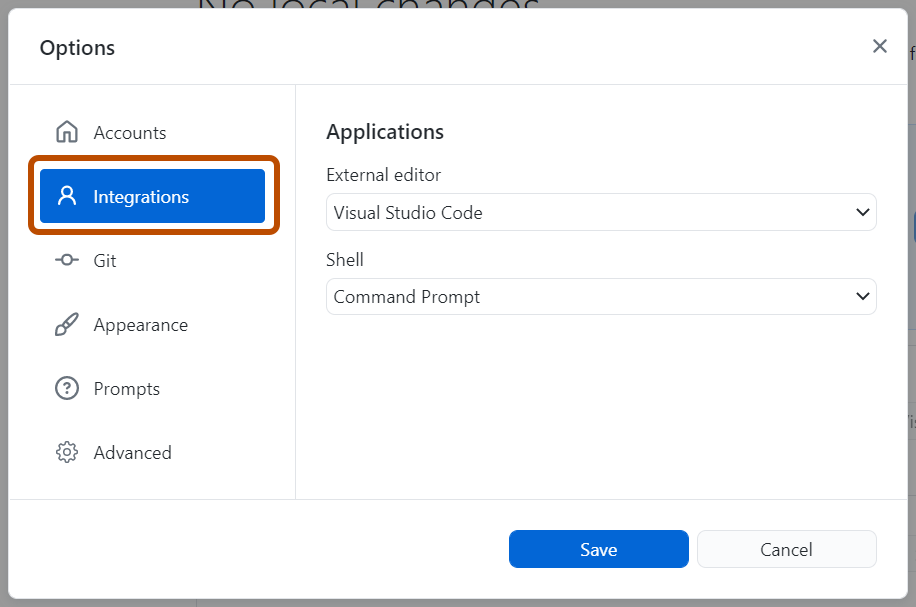
In the Preferences window, select Integrations.
-
Under "External Editor", use the dropdown menu to select Configure Custom Editor.
-
Click Choose to open the system dialog to navigate to the path of your custom editor.
-
Under "Arguments", enter any arguments you would like to use after the "%TARGET_PATH%" variable. Reference supporting documentation for your custom editor to ensure you have the arguments set correctly, as invalid arguments can prevent the editor from launching in GitHub Desktop.
-
Click Save.

Opening a repository in the default editor
To open the current repository in the default editor, you can use the menu bar:
- In the menu bar, select Repository.
- Click Open in default editor
If you want to open another repository in the default editor, you can use the repository list.
- In the upper-left corner of GitHub Desktop, to the right of the current repository name, click .
- Right-click the repository, then click Open in default editor.
Tip: You can use the Shift+Command+A keyboard shortcut to open a repository in the default editor.
Tip: You can use the Ctrl+Shift+A keyboard shortcut to open a repository in the default editor.
Opening a file in the default editor
- Navigate to the "Changes" tab in the left sidebar.
- Double-click on the file, or right-click on the file and select Open in default editor.